A day-to-day strive
Thursday, May 22, 2014

Leave Cali day 31

Putting a new top end on a 1979 Sportster. I keep transferring files from binders to the NAS. pdf version
2014-05-22_Leave-Cali-day-31_01.jpg
On the way back from the Hollister run many years ago, I burned up a piston on my 1979 Sportster. It stayed broken for many years, I had 5 other Sportsters to ride. One problem was I was unhappy with all the engine rebuild shops. All I needed was a bore and hone job on the cylinders, and new pistons fitted. Maybe I should have tried the dealer, but Harley dealers hate this old Iron Sporty stuff. Eventually, I just bought new cylinders and matching pistons from V-Twin, I think through J&P Cycles. It's pretty sad I did not think there was a decent motor shop in all of Silicon Valley. I thought about sending off to Dragon Machining in Colorado-- but I was out of time. I had to ship the bikes to Florida in a month, and I needed to get this together fast. Only highlights, the full build will be posted here.
Bottom of first columnmove down to the left

2014-05-22_Leave-Cali-day-31_02
This is an older picture of the front piston on my 1979 Sportster. It might have been an air leak, it might have been retarded timing.
2014-05-22_Leave-Cali-day-31_03
The new cylinders are well-packed.
2014-05-22_Leave-Cali-day-31_04
You put the pistons on the rods and clip in the piston pin.
move up a little to the right move down to the left
2014-05-22_Leave-Cali-day-31_05
The cylinders are on, I made sure to wash them before oiling them up.
2014-05-22_Leave-Cali-day-31_06
Getting the right side head-bolts on the rear cylinder is a real hassle. I now use a wrench.
2014-05-22_Leave-Cali-day-31_07
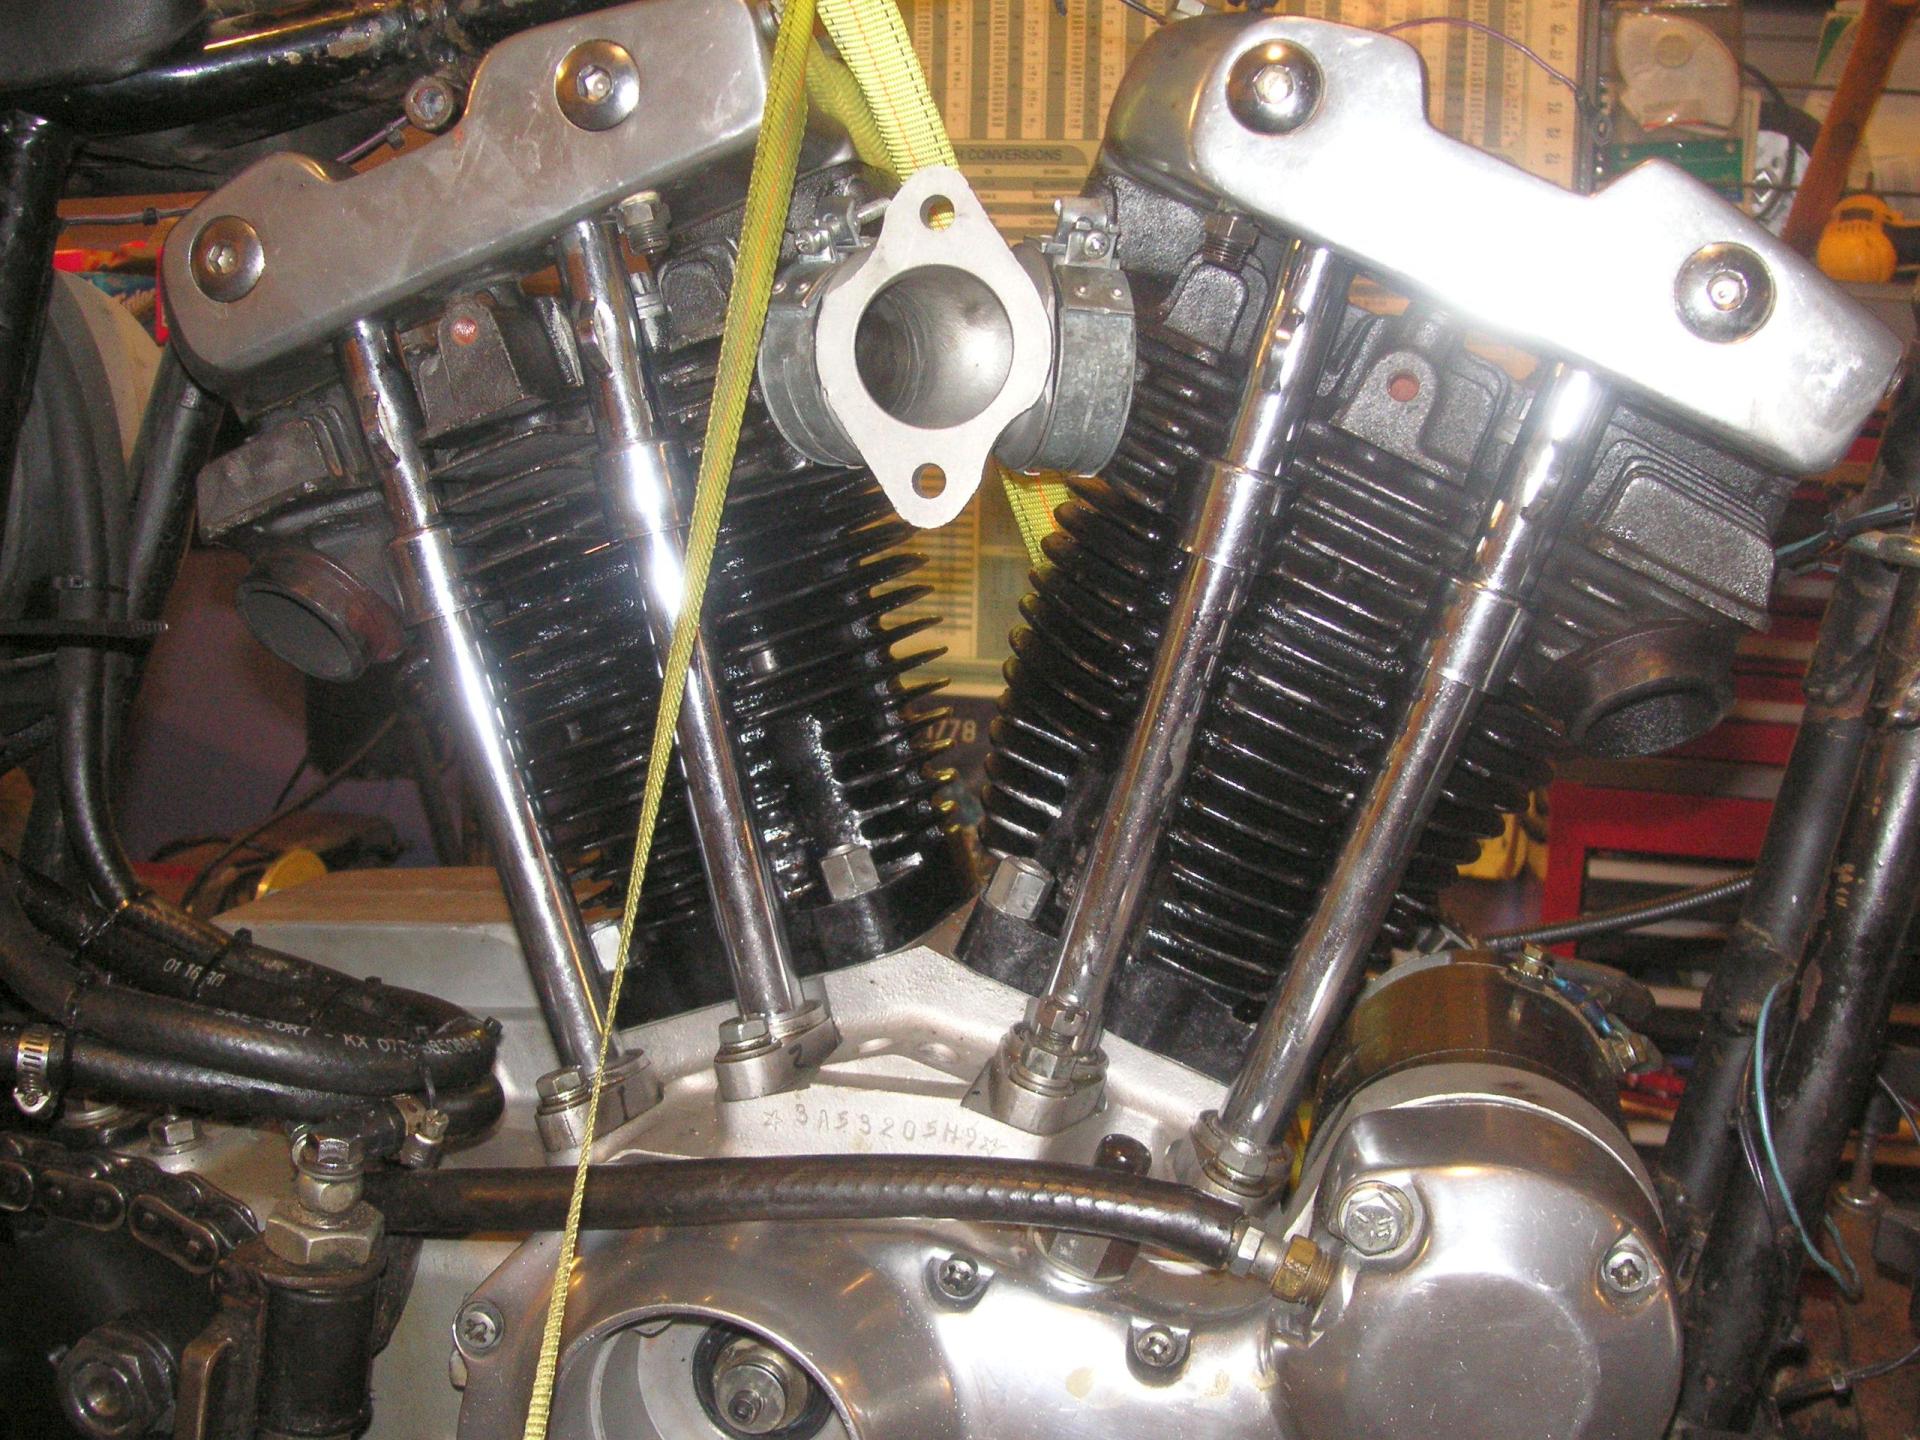
Note the big divots in the intake manifold. This can be a killer air leak.
move up a little to the right move down to the left
2014-05-22_Leave-Cali-day-31_08
Mount the manifold without the carburetor to make sure it is in right.
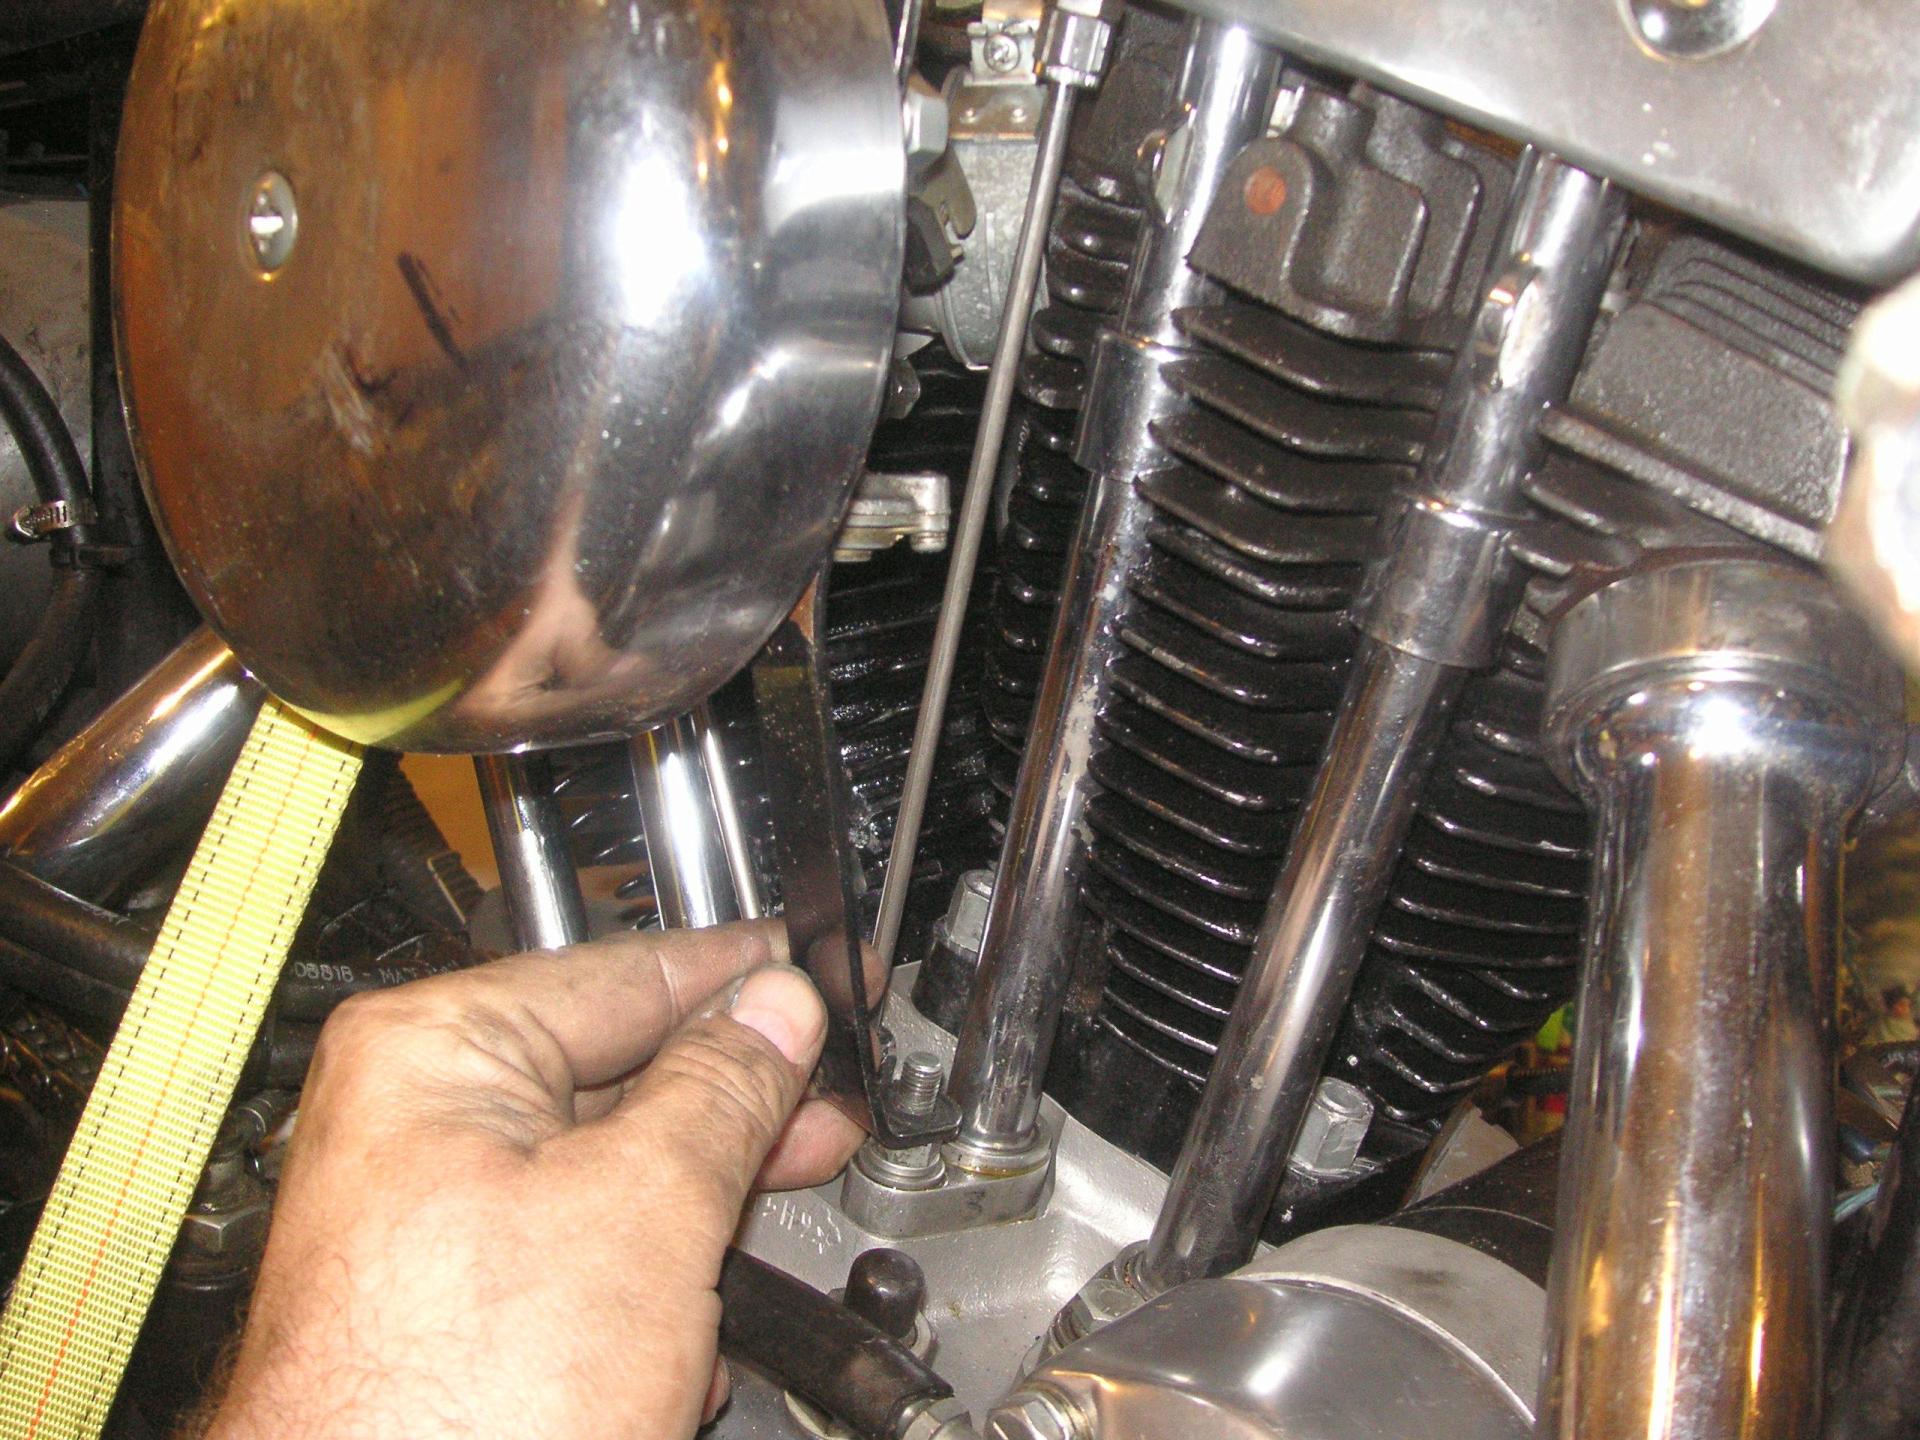
2014-05-22_Leave-Cali-day-31_09
With the "rubber band" style intake manifold gaskets used on 1979 Sportsters, you absolutely have to support the carburetor. You can put in this bracket, or some models have threaded holes on bosses in the heads that the air filter mounts to. If you don't support the carb, it flops around until it chews up the rubber band gaskets. Then you get an air leak. Then you burn a piston like in the picture at the beginning. To check for air leaks, spray some carb or brake cleaner at the manifold, making sure no spray goes into the air filter. If the bike speeds up, or slows down, or changes in any way, you have an air leak you need to fix. Bill Andrew taught me never to "gravy lick" the job by mounting the manifold and carb as one piece. Do the manifold separate, so it's right.
move up a little to the right move down to the left
2014-05-22_Leave-Cali-day-31_11
The day's pictures ended with this-- I assume I was transcribing these design files from the loose-leaf binders in the lab to my network attached storage (NAS).
.
2014-05-22_Leave-Cali-day-31_10
The day started with this picture. So I guess I was putting this into the NAS this day as well. This is a job I did in 1998 for Hewlett Packard. It was a power supply for an automotive diagnostic system. One day I will get around to putting these files up on the internet. It was an interesting job, a PC power supply that also ran from a battery pack, as well as attached to a car's battery to run and charge the internal battery.

As to the 1979 Sportster, you will see I need to re-do the oil pump, but it is otherwise ready to ship to Florida. That happens in two months.
move up a little to the right move down to the left
border bar
Bottom of first column This is the end.