Big projects to simple ideas

Creality CR10-S5 bed heater

The factory bed heater is way too small for the 510 x 510mm bed. Replace it with a full-size bed heater. pdf version
YouTube-splash-screen
I replace the 310mm x 310mm heater pad with a 510mm x 510mm stick-on pad. This keeps the corners of large parts from warping.

The Creality CR10-S5 is a fantastic value. They sell for about 700 dollars and have a 500 x 500 x 500mm print volume. The CR10-Max has a slightly smaller print volume but has the electronics built into the base. I prefer the S5 with a separate control box. This what I can build an enclosure around the printer and keep the box outside the enclosure.

The printer makes decent prints, but if you try to use the whole bed, you soon learn that the bed heater only works in the center area, leaving the edges too cool for good adhesion.
When I bought the printer, Sainsmart had an optional 110V bed heater you could add to the box. I did, but that bed heater is not full size either, its 380mm square. It's better than the 310mm heater the printer comes with, but would still not get heat out to the edges.

Thankfully, there are true 510mm full-sized bed heaters (affiliate link) available, with all the holes pre-drilled so you can clear the screws used to put the bed together.

When you get the heater, don't make my mistake and plop it wire-side up on top of the bed of your printer. The screws don't line up. Remember the heater glues to the bottom of the bed, and there the screw holes do line up.
Bottom of first columnmove down to the left

CR10-S5-bed-heaters.
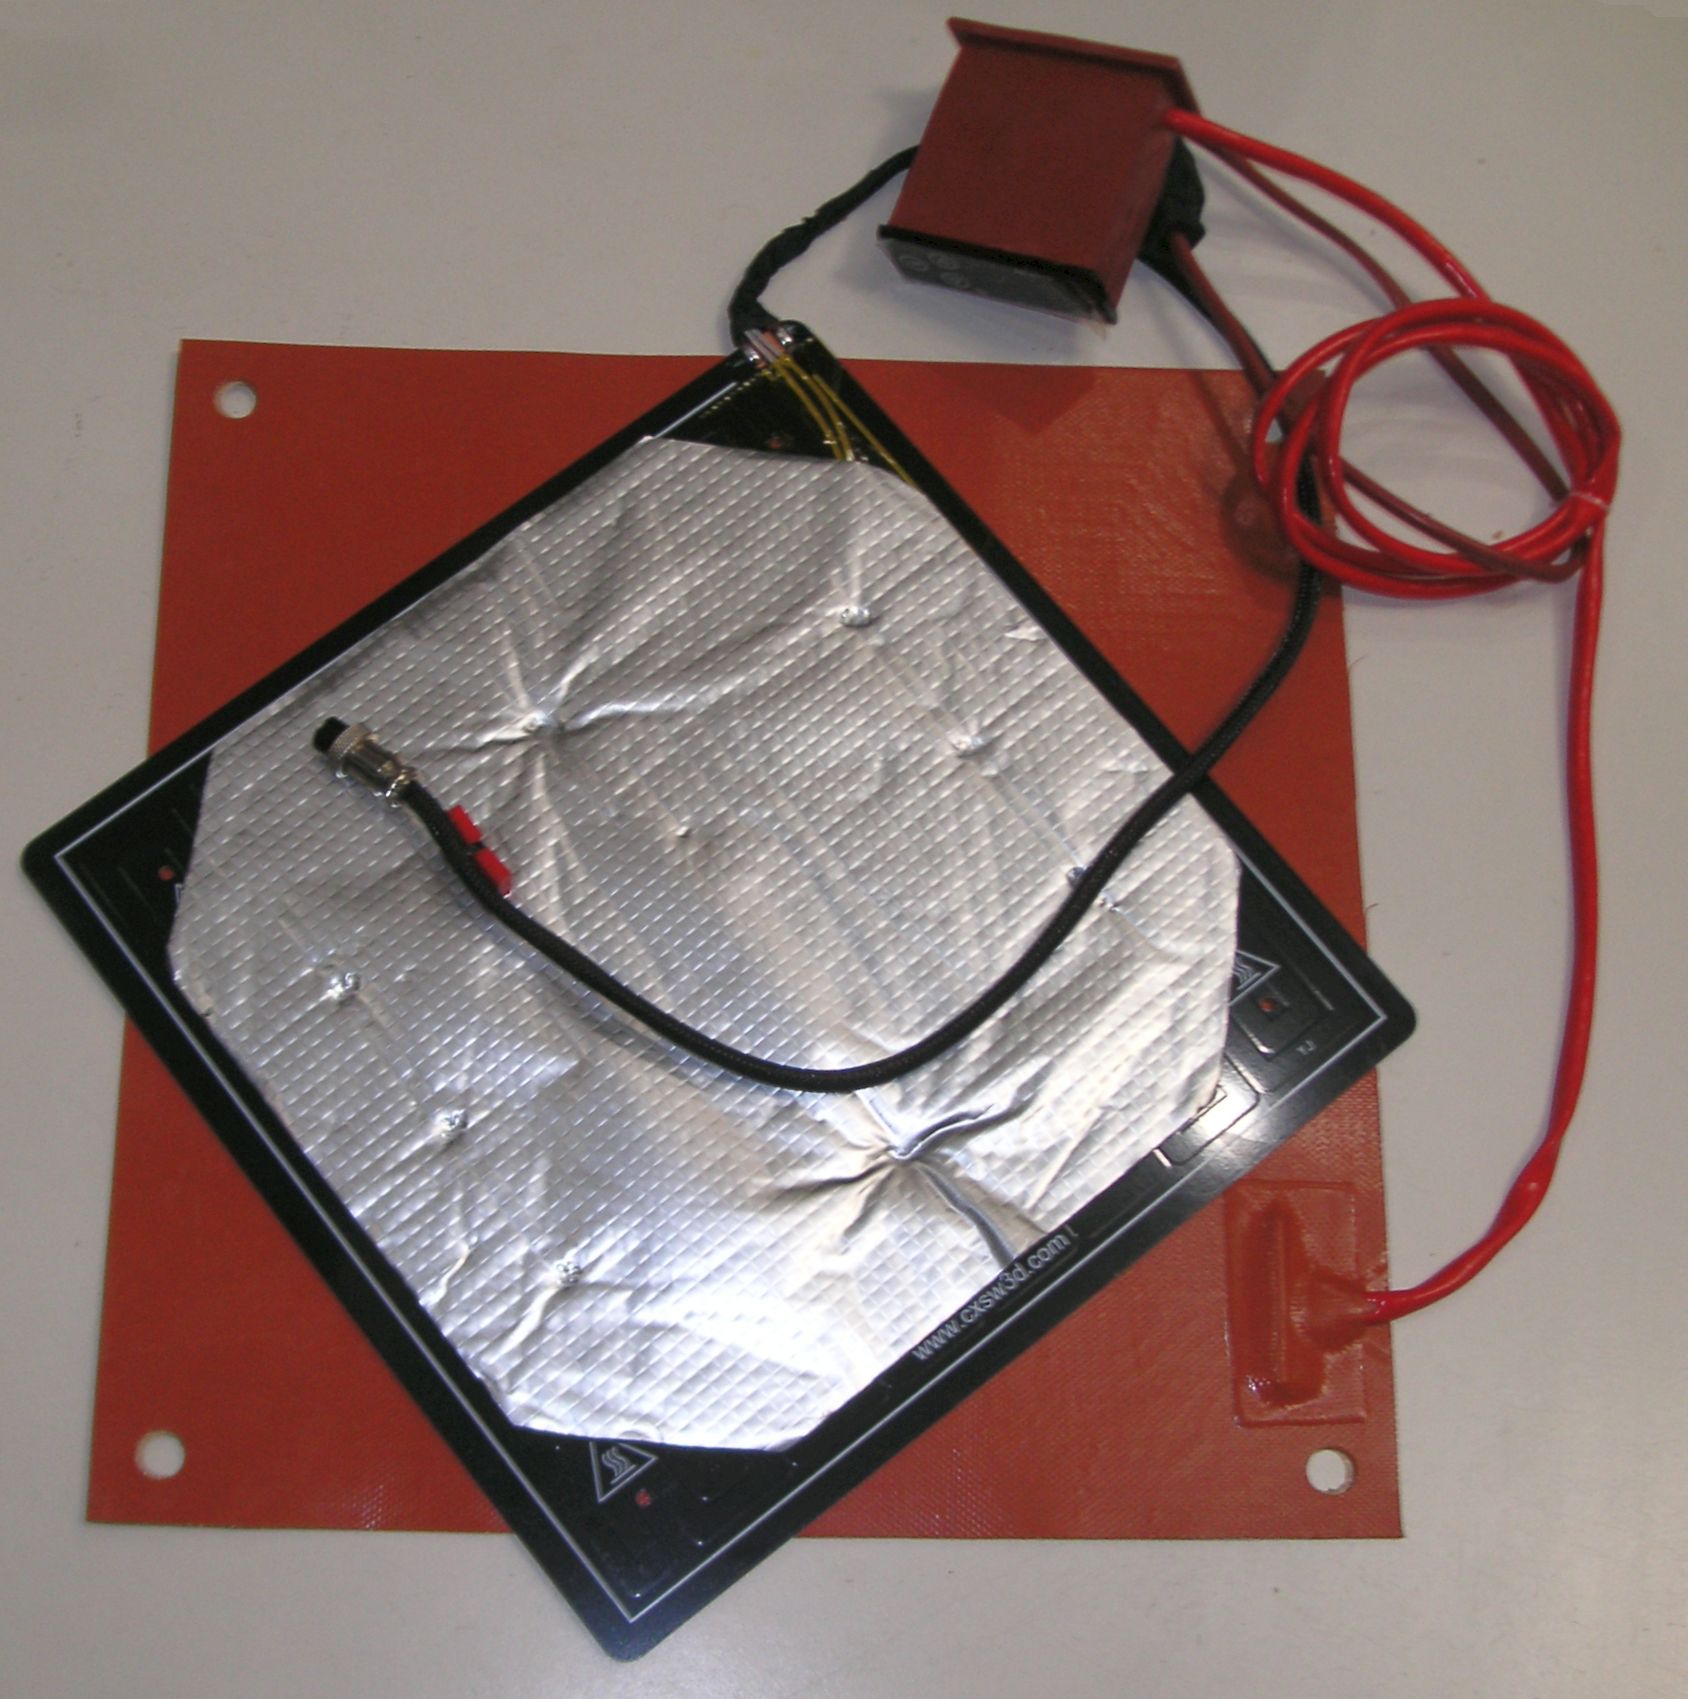
The factory heater is the black and silver plate, laid on top of the first aftermarket heater I bought, which is still too small.

The original heater plugs into the CR10 control box. It is powered by the internal 12V power supply. It also has a sensing thermistor in the pad, that the control box can use to measure the temperature.

The after market heater plugs into the wall, and is much more powerful. It can get to target heat much faster, and it can produce a higher temperature. The high temperatures are useful for printing ABS and polycarbonate plastics. It comes with its own little control box. This means you have to set the temperature you want with this little box before you start your 3D print. This also means you have to "fool" the control box, which will try to read the thermistor which is no longer attached.

Usually you can set your sliver software to print at room temperature, and this will result in the G-codes running. Just be sure you have set the external box correctly before you print.
move up a little to the right move down to the left
500mm-bed-heater.
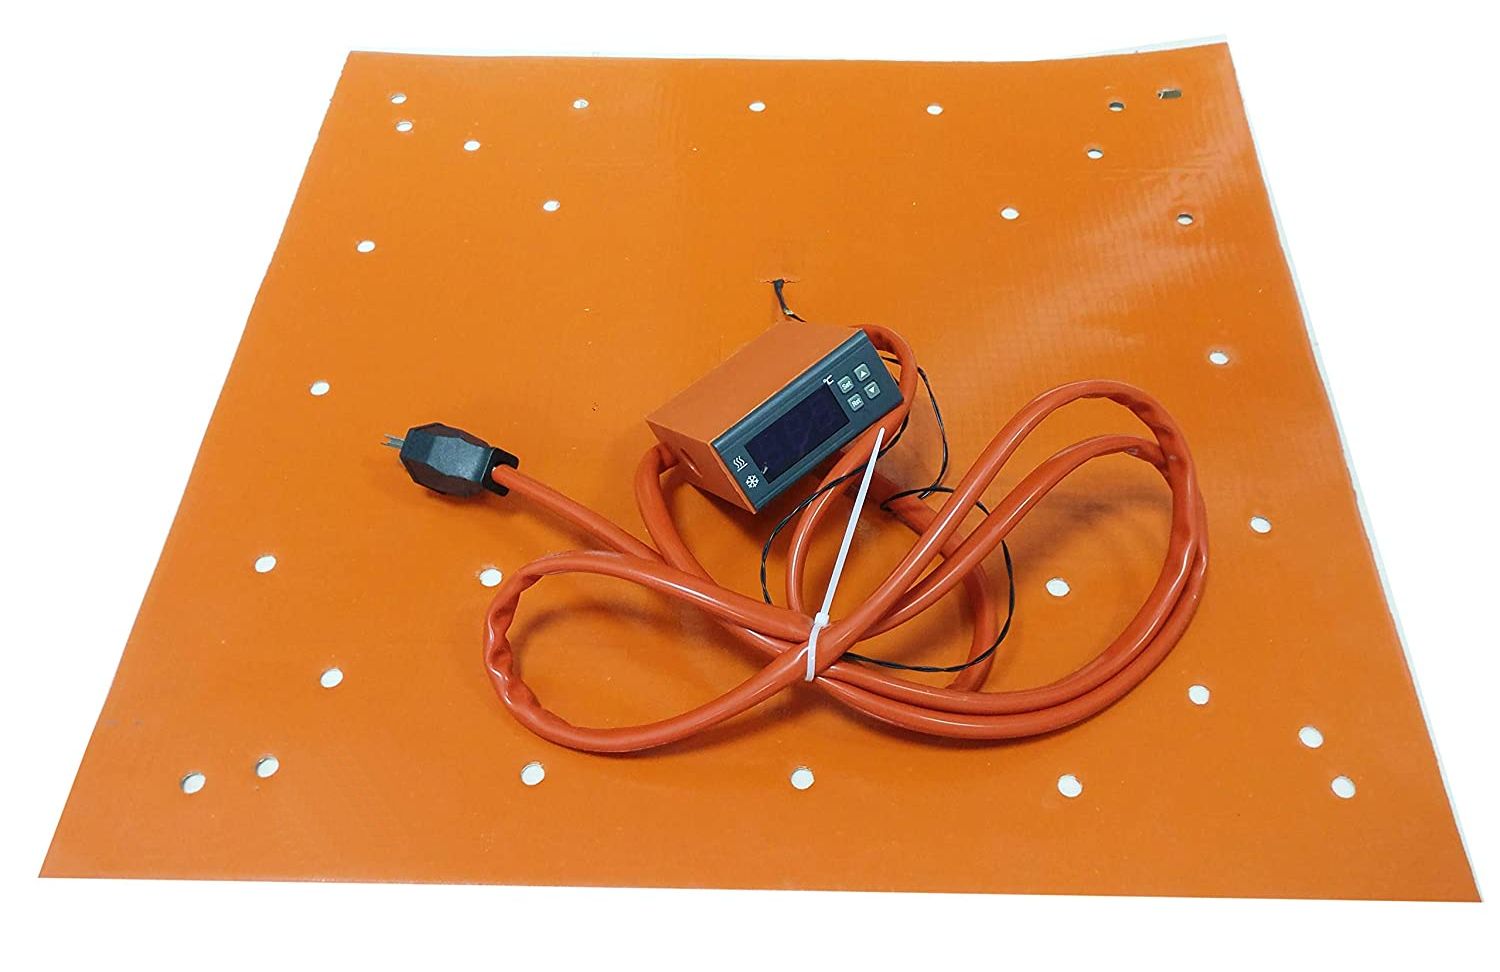
This is the 510mm heater from Amazon. They also show up on eBay and Alibaba, and Banggood. It came from Hong Cong, and arrived early. My cost was 129 dollars.

Unlike the factory heater, this heater has adhesive on the underside that you peel off a wax paper sheet and then glue the heater to the bottom of the bed. Aligning the heater pad is critical, make sure the four holes where the leveling springs go are best centered, so the springs sit flat on the bottom of the plate.

Warped-engine-case
The full-sized heater keeps the bed temperature uniform within 5℃. This should solve the problem of my prints lifting up off the bed out at the far corners. This is the corner of a prototype engine case model where the gasket surface is far from flat.
move up a little to the right move down to the left


This post is in these categories:


border bar
Bottom of first column This is the end.