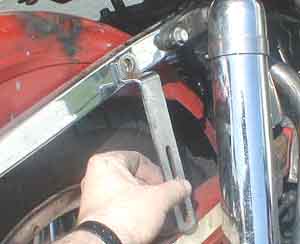
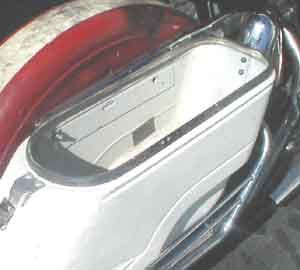
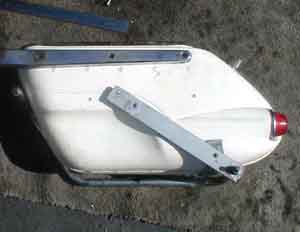
Saddlebags
`
`
`
`
`
`
`
The first part of a custom installation like this is the "Cogitatin' and Calculatin" part.  This takes far longer then the actual cutting and sawing and welding.  The bags came with mounts that were for a 60's vintage Honda Dream.  A great bike, but with far different mounting requirements.  It was immediately obvious I couldn't use the old mounts.  The first thing that any intelligent person should then consider is if they can adapt the old mounts in some way.  A pair of these brackets came with the old mounts and I am noticing how they would space the bags out just about right to clear the chain-gaurd.  It turns out I did not use these brackets but I wanted to show all the cogitatin' that went into the project.
The next order of business was to see if I could use the existing hole in the bags for my application.  Here we see a long bolt passed through the strut and through the existing hole in the bag.  Yeah, you guessed it, I couldn't use either of the two holes.  I need to move the bags an inch and a half forward for two reasons: 1) they would look better snuggled up against the shocks.  2) the inch and a half would move the bag to where the forward bolt in the strut would go through the flat part at the front of the bag. It would still miss the little metal reinforcing plate you can see but I figured I could fix that soon enough.
Ah, you finally get to see a nice profile view of the bag.  It was an inexpensive aftermarket bag in the 60's but I think that it looks really cool with the deco styling.  The twin taillights are another bonus, especially to a guy like me with a broken collarbone from being hit from behind while stopped at a light.  About this time I had got it-- "The Inspiration".  I figured I wanted space the bags out 2 inches from the fender struts and have the holes line up with the strut holes so the same bolts went through the fender, strut and saddlebags.  Very satisfying from a structural and safety point of view.  The inspiration was to go into my parts stash and get a couple used, beat up struts to cut up and mount to the bag.  Then I could weld the strap you see to the strut to mount the crash bar that goes around the bag.  The flat strap came with the bags and was part of the original mounting to the Honda.
`<--- Previous
.pdf file (1,725k)
Home
Page 2
Next --->
Printer Instructions:

For Netscape: Open "Files/Page Setup".  Uncheck all boxes.  Set margins to 0.  Open "Files/Print".  Set print range form 1 to 1 in order to suppress the printing of this instruction box.  Open "Files/Print Preview" to se what the page will look like.  Netscape will generally print the colored sections and reverse text. 

For Explorer: Open "Files/Page Setup".  Clear contents of header and footer box.  Set margins to 0.  Windows will default values back to minimum possible with your printer (i.e. 0.213).  You can open "Files/Print Preview to see what page will look like.  Open "Files/Print" and set range from 1 to 1 in order to suppress the printing of this instruction box.  Explorer will convert all colored backgrounds to white and all text to black.  Once again, geeks trying to do your thinking rather then doing your work.  Aren't you glad you hate Microsoft?  Don't you wish everyone did?

Notes:

Authoring: This site is created with the free composer program that comes with Netscape.  We are using 4.7 since rev 6 will not start on our Win2k box.  (Some coincidence that the latest Microsoft OS breaks Netscape huh?)

Our Guarantee: No Frames, no Java, no Swift C, no cookies, no cascading style sheets, no dot net monopoly bully and no Active Server Pages.  Minimal graphics and no audio without request.  Most documents in this site are available on pdf format and those will have full graphics content.  We also make the source documents available whether Excel or Word or Autocad.  We believe engineering and technology are an art.  Free sharing and expression are more important than small-minded monopoly rent seeking.  Feel free to use the files and materials on this site.  Good luck with your projects.

Copyleft, 1995, 1996. 1997, 1998, 1999, 2000, 2001 Rako Engineering
Copy any content and distribute freely with credits given.
Page rev: 04Jun01